Déploiement avec Wercker
Objectifs
À la fin de ce guide, vous aurez terminé ce qui suit
- Création d’un projet et d’un site web basés sur Hugo
- Contrôle de version sur votre projet avec Git
- Ajout de votre projet à GitHub
- Automatisation des déploiements de sites avec un outil gratuit appelé Wercker
- Déploiement de votre site Web sur GitHub Pages pour un hébergement gratuit
Hypothèses
- Vous êtes à l’aise sur l’utilisation de Git pour le contrôle de version
- Vous avez un compte GitHub
- Vous avez déjà créé un projet Hugo de base
Si vous ne respectez pas ces hypothèses, la section d’aide GitHub explique comment installer et d’utiliser git. S’inscrire et créer un compte GitHub est également gratuit. Si vous n’êtes pas complètement familiarisé avec la création d’un nouveau site Web Hugo, visitez le [QuickStart Hugo][démarrage rapide].
Créez un Site Basique Hugo
Tout d’abord, créez votre nouveau site Web Hugo à l’aide de la commande hugo new site et déplacez-vous dans le répertoire créé pour le projet. Dans ce guide, nous appelons notre nouveau projet hugo-wercker-exemple :
hugo new site hugo-wercker-exemple
cd hugo-wercker-exemple
Nous utiliserons le [theme Herring Cove][] en clonant d’abord le thème à l’intérieur du dossier themes.
cd themes
git clone https://github.com/spf13/herring-cove.git
Cloner le projet à partir de la ligne de commande provoquera un conflit avec notre propre contrôle de version. Aussi, nous devons retirer la configuration externe git qui vient avec le clone de Herring Cove:
rm -rf herring-cove/.git
Nous avons besoin de contenu à construire pour Hugo. Ajoutons une page rapide /a-propos :
hugo new a-propos.md
Maintenant, vous pouvez modifier contents/a-propos.md dans votre éditeur de texte préféré, mais ce n’est pas indispensable pour les besoins de ce guide. Lancer la commande qui suit construira votre site Hugo à l’intérieur du dossier public. Nous avons ajouté undraft pour nous assurer que la page d’exemple n’est plus en mode draft (brouillon) :
hugo undraft content/a-propos.md
Une fois le site web construit, c’est une bonne idée de lancer la commande suivante pour démarrer un serveur local et vous assurer que vos modifications ont bien été implémentées :
hugo server --theme=herring-cove
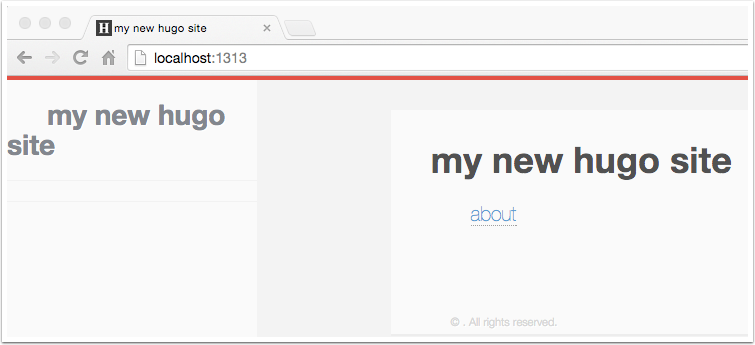
Si tout va bien, vous devriez voir quelque chose de similaire à l’image ci-dessous quand vous allez sur http://localhost:1313 dans votre navigateur.
Configurer le contrôle de version dans Git
L’ajout de Git à votre projet se fait en exécutant la commande git init à partir du répertoire racine de votre projet.
git init
Exécuter git status à ce stade vous présentera les entrées suivantes : le fichier config.toml, le dossier themes, le dossier contents et le dossier public. Cependant, nous ne voulons pas que la version du dossier public soit contrôlée car Wercker est responsable de la génération du site Web terminé. Par conséquent, nous ajouterons un fichier .gitignore à notre projet pour exclure le répertoire /public d’être suivi par Git :
echo "/public" >> .gitignore
Wercker pourrait se plaindre quand nous essaierons plus tard de construire le site, parce que nous n’avons pas à cette heure quelque fichier statique en dehors du dossir themes. Nous devons simplement ajouter n’importe quel fichier au dossier static pour éviter à Wercker de se plaindre. Pour faire que ce guide reste simple, ajoutons un robots.txt. La commande qui suit crée le fichier dans /static. Les contenus du fichier robots.txt permettent de faire savoir aux moteurs de recherche qu’ils ont un accès complet pour crawler le site web publié :
echo "User-agent: *\nDisallow:" > static/robots.txt
Maintenant, nous devons ajouter (c’est à dire, stage [voir documentation Git]) et commit de nos modifications dans le repo à l’intérieur de Git :
git commit -a -m "Initial commit"
Ajouter le Projet à GitHub the Project to GitHub
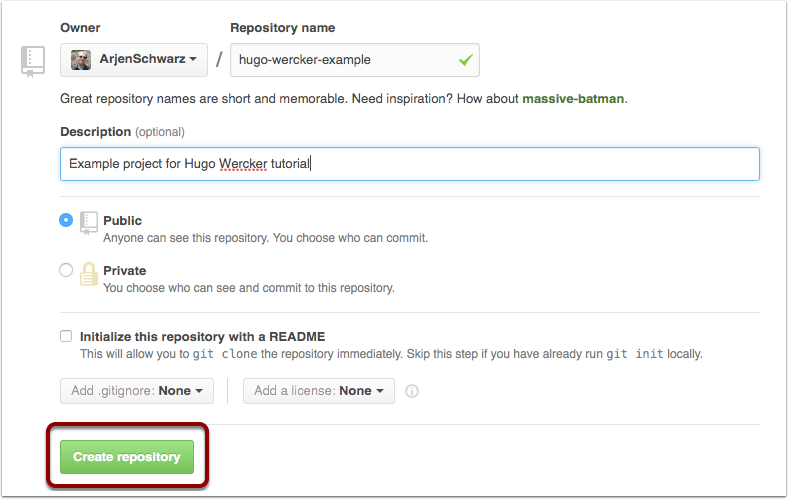
Maintenant, nous devons créer un nouveau dépôt sur GitHub. Une fois que vous êtes connecté à GitHub, vous pouvez ajouter un nouveau dépôt en cliquant sur le menu déroulant *+▼ en haut et à droite ou en allant sur https://github.com/new
We then choose a name for the project (hugo-wercker-exemple). When clicking on create repository GitHub displays the commands for adding an existing project to the site. The commands shown below are the ones used for this site, if you’re following along you will need to use the ones shown by GitHub. Once we’ve run those commands the project is in GitHub and we can move on to setting up the Wercker configuration. Be sure to replace YourUserName with your GitHub account/username:
Nous choisissons ensuite un nom pour le projet (hugo-wercker-exemple). Lorsque vous cliquez sur “create repository”, GitHub affiche sur son site les commandes pour ajouter un projet existant.
Les commandes ci-dessous sont celles utilisées pour ce site, si vous suivez le guide vous devrez utiliser celles indiquées par GitHub. Une fois que nous avons exécuté ces commandes, le projet se trouve dans GitHub et nous pouvons passer à la configuration de Wercker. Assurez-vous de remplacer VotreNomUtilisateur par votre compte/identifiant GitHub :
git remote add origin git@github.com:VotreNomUtilisateur/hugo-wercker-exemple.git
git push -u origin master
Set Up Wercker
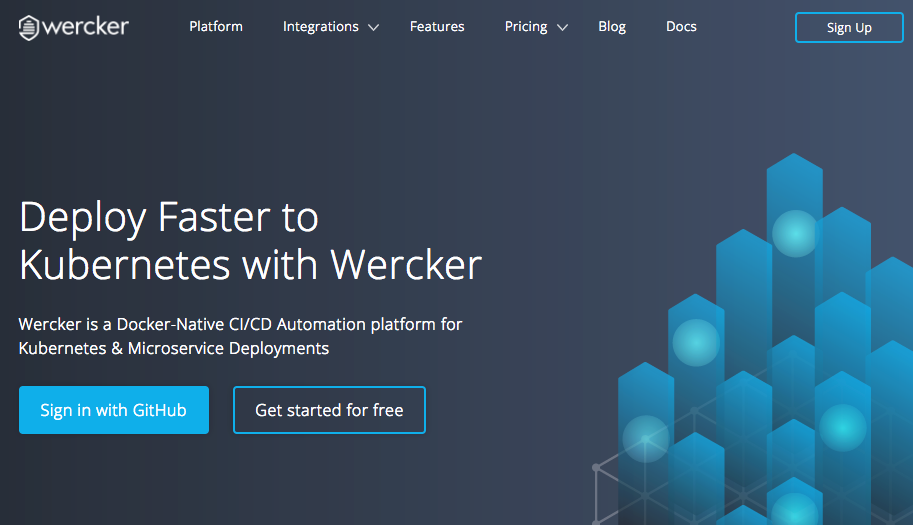
To sign up for a free Wercker account, go to https://wercker.com and click the the Sign Up button on the top right of the home screen.
Registe for Wercker with Your GitHub Account
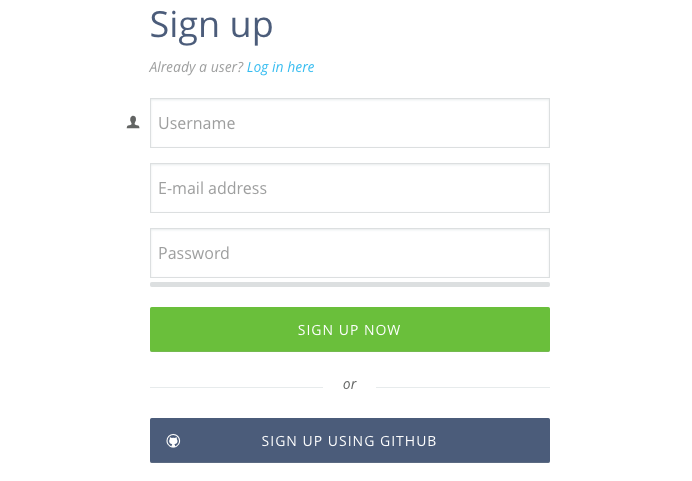
Sign up for Wercker using your GitHub credentials. If you don’t have a GitHub account, or don’t want to use it for your account, you have the option to register with a username and password as well. However, the second half of this guide—devoted to hosting your website on GitHub pages—will no longer be of interest to you.
Connect GitHub or Bitbucket
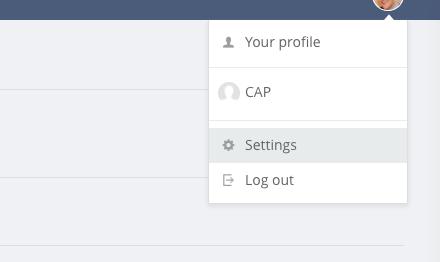
After you are registered, you will need to link your GitHub or Bitbucket account to Wercker. You can link your account by navigating to your profile settings and then selecting “Git connections.”
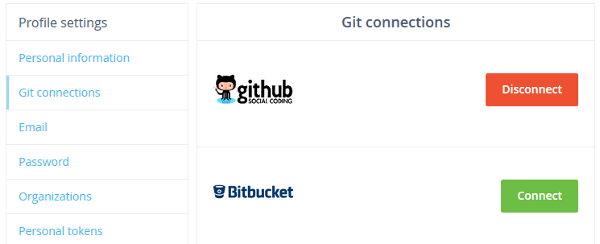
If you registered for Wercker using GitHub, it will most likely look like the following image. To connect a missing service, click the Connect button, which may send you to either GitHub or Bitbucket to sign into your respective account.
Add Your Project
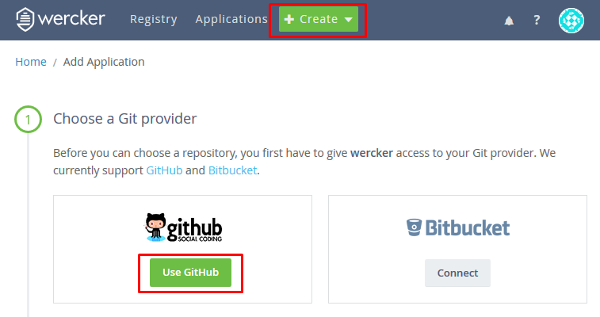
Now that we’ve got all the preliminaries out of the way, it’s time to set up our application. For this we click on the + Create button next to Applications and choose GitHub as our provider.
Select a Repository
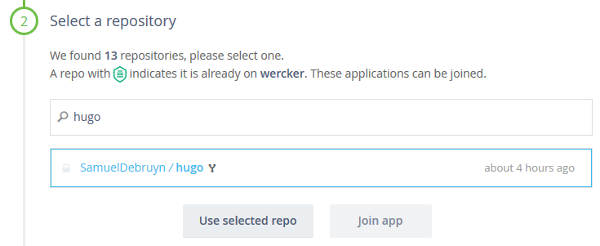
When selecting GitHub, Wercker will show all your GitHub repositories. You have the option to filter repositories using the search input at the top of the repositories list. Once you have your repository selected, click the Use selected repo button.
Select the Repository Owner
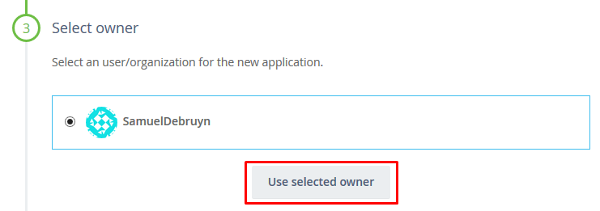
In the next step, Wercker asks you to select the repository owner. Select your GitHub account and continue.
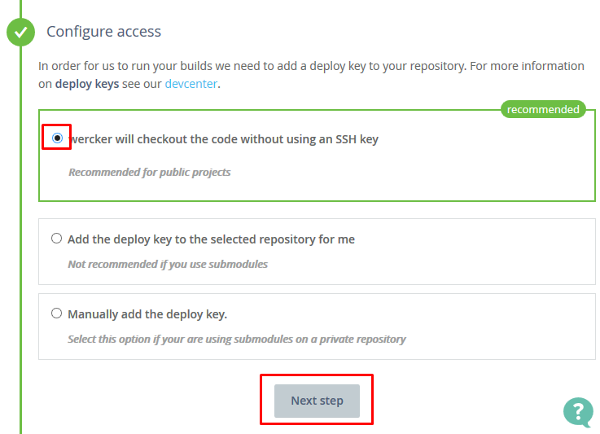
Configure Access
This step can be slightly tricky. Wercker does not have privileges to check out your private projects by default and therefore needs your permission to add a deploy key to your repository. By selecting the first option, you’re simply allowing Wercker to check out the code via the same methods available to anyone visiting the project on GitHub.
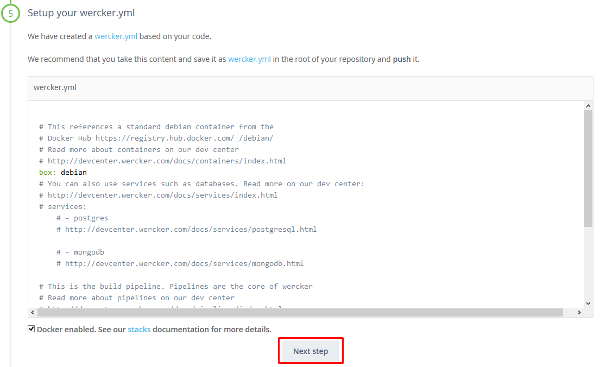
Wercker.yml
Wercker will now attempt to create an initial wercker.yml file for you. More specifically, it will create a code block within the Wercker interface that you can copy to your finished file. Wercker gives us a debian box because our project does not have any special requirements.
Now we need to create a wercker.yml file in the root of our project. This file will contain our Wercker app’s configuration. After we finish setting up our app, we will expand the contents of this file to build and deploy our website.
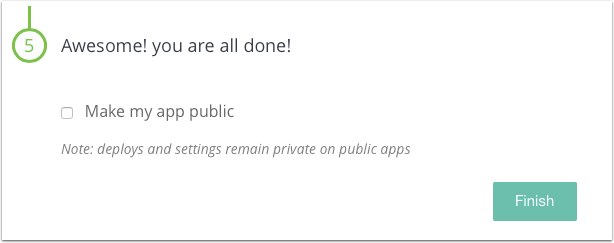
Public or Private
This is a personal choice. You can make an app public so that everyone can see more details a-propos it. Keeping it private or public does not provide any overt benefits for you as the creator of the app. That said, the app we are currently creating has been made public to facilitate easier usage of this hosting and deployment guide.
App Successfully Created
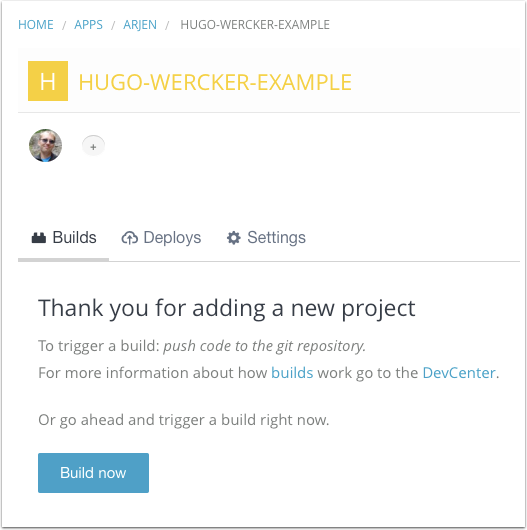
The application is now added and Wercker will offer you the chance to trigger a build. However, we will decline the offer because we haven’t yet pushed our wercker.yml file to our GitHub repository.
Add the Hugo-build Step
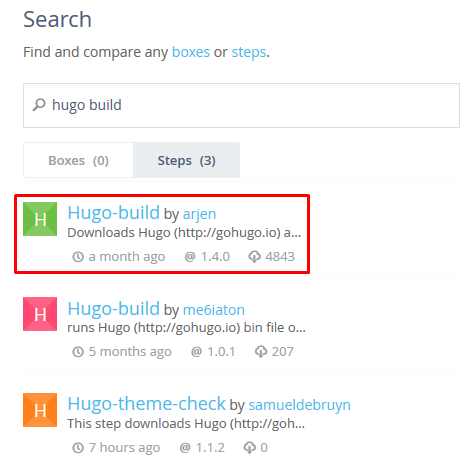
Now we need to add the Wercker steps to our build process. First, we go to the “Registry” action in the top menu. When in the registry, we can search for “hugo build”. Select the “Hugo-Build by arjen” step.
Use the Hugo-build Step
A summary of very basic usage is available at the top of the details for the Hugo-Build step. Below the basic usage is the contents of the README.md file associated with the step’s repository. README.md’s on Wercker usually contain more details a-propos the advanced options and exemples of usage.
We’re not going to use any of the advanced features of Hugo-Build in this guide. Let’s return to our project and add the first section of details we need to our wercker.yml.
box: debian
build:
  steps:
    - arjen/hugo-build:
        version: "0.17"
        theme: herring-cove
        flags: --buildDrafts=true
We can conclude this first step by pushing our wercker.yml to our GitHub repository and then seeing the magic at work within Wercker’s interface.
git commit -a -m "Add wercker.yml"
git push origin master
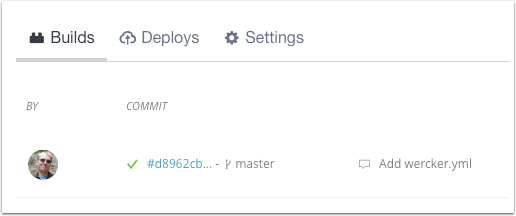
If completed and successful, a green check mark should appear in the commit column of your first build. However, this is only the build step. We still need to deploy the website to our free hosting on GitHub Pages. If you would like more details a-propos the build, you can click the commit hash.
Add a GitHub Pages Deploy Step to wercker.yml
In order to deploy to GitHub Pages, we need to add a deploy step to our wercker.yml. We are going to add lukevevier/gh-pages, the most popular GitHub Pages step in the Wercker Steps repository. Additionally, we need to ensure the box Wercker uses for our deployments has git and ssh installed. We can do this using the install-packages command. Here is our final wercker.yml file:
box: debian
build:
  steps:
    - arjen/hugo-build:
        version: "0.17"
        theme: herring-cove
        flags: --buildDrafts=true
deploy:
  steps:
    - install-packages:
        packages: git ssh-client
    - lukevivier/gh-pages@0.2.1:
        token: $GIT_TOKEN
        domain: hugo-wercker.ig.nore.me
        basedir: public
How does the GitHub Pages Configuration Work?
We’ve provided a some important information in our wercker.yml. First, we’ve added the domain we want to use for our published website. Configuring the domain here will ensure that GitHub Pages is aware of the domain we want to use.
Secondly, we’ve configured the basedir to public. This is the directory that will be used as the website on GitHub Pages. public is also the default publishing directory in Hugo. (For more information, see hugo’s configuration docs).
Lastly, you’ll notice a $GIT_TOKEN variable. This is used for pushing our changes to GitHub. We will need to configure this token before Wercker can build our website.
Set the App’s Deploy Target
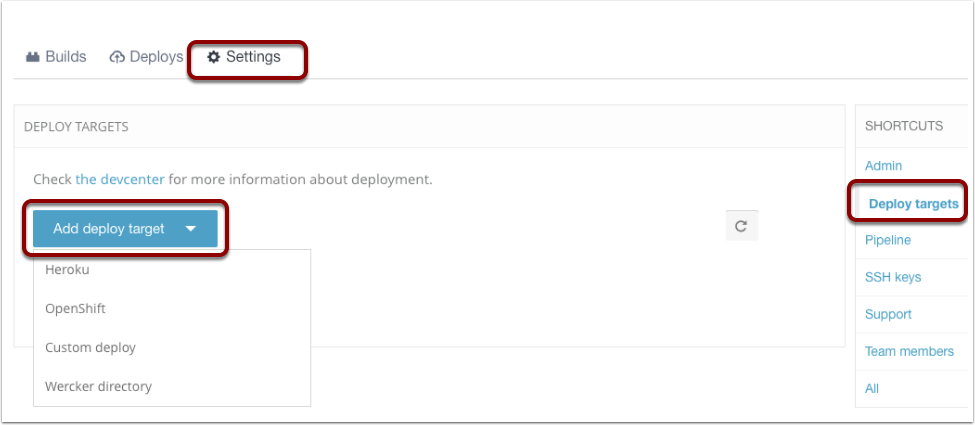
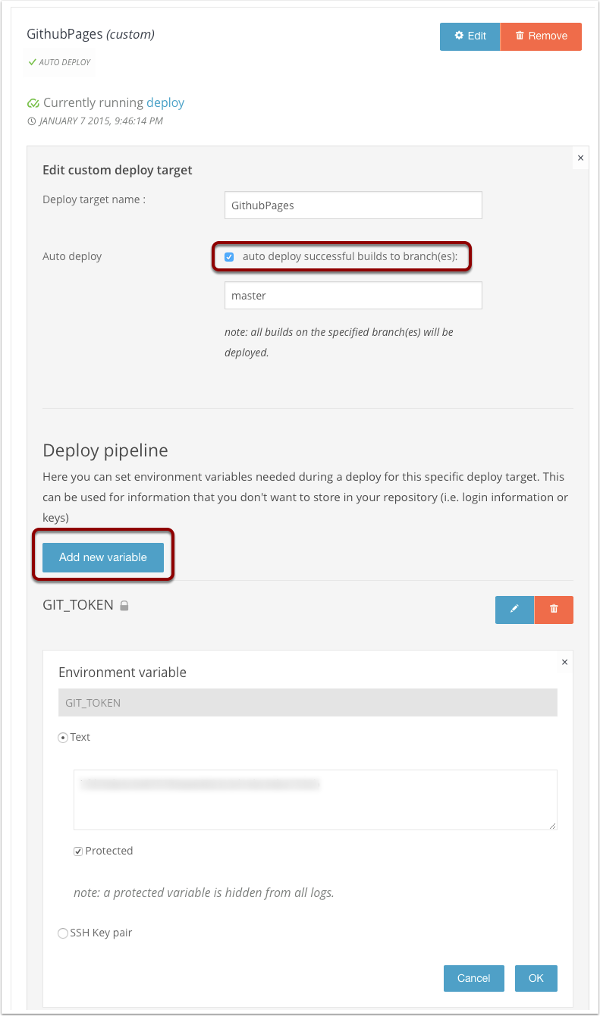
We can set our deploy target by going to our app’s settings and clicking on Deploy targets. Now select Add deploy target and then Custom deploy.
Configure the Deploy Step in Wercker
The next screen requires you fill in the deploy target name.
- Make sure you enable auto deploy from the master branch.
- Add a variable for the GIT_TOKEN. You’ll need to create an access token in GitHub. Follow the directions in GitHub help.
- With the deploy step configured in Wercker, we can push the updated wercker.yml file to GitHub and it will create the GitHub pages site for us.
The website described in this guide is available at http://hugo-wercker.ig.nore.me.
Conclusion
Once this workflow is established, you can update your website automatically by pushing any content changes to your GitHub repository.
Code for the Wercker Deployment Guide
The source code for the site used in this guide is available on GitHub, as is the Wercker Hugo Build step.
If you want to see an exemple of how you can deploy to S3 instead of GitHub pages, check Wercker’s documentation for guidance on setup.